Pages

Friday, September 23, 2022

ChezCindy: Pasta Risotto with Chicken and Mushrooms


Making pasta in the style of risotto is not a new thing.  I simply had not tried this process before now.  It is good!  The pasta takes in flavor, absorbing the stock, garlic and vegetables as it hydrates and cooks.  It becomes full of flavor with great texture.  The tradeoff is the amount of time and attention it takes to make the pasta risotto.  You will need to tend to the pasta adding stock stirring for roughly 20 minutes.  I found it be a relaxing transition from a full day while I enjoyed a glass of wine.  


Pasta Risotto with Chicken and Mushrooms
3 tablespoons olive oil
1 small onion, finely diced
1 tablespoon minced garlic
2 cups brown or white button mushrooms, sliced
1 tablespoon tomato paste
2 cups dry gemelli or penne pasta
1/2 cup dry white wine
3-4 cups chicken stock
3 boneless skinless chicken thighs, cut into 2-inch pieces
2 teaspoons kosher salt, divided
black pepper
fresh parsley, chopped
fresh grated Parmesan cheese

Working with a large Dutch oven pan over medium-high heat, add in the olive oil.  When the oil is hot, add in the onion, garlic and mushrooms, stirring to coat in oil.  Cook while stirring occasionally for 6-7 minutes, then add in 1 teaspoon of kosher salt and a few grinds of black pepper.  Add in the tomato paste, stirring to incorporate with the mushrooms.  Add the dry pasta to the pan with the mushrooms, stirring together, then add in the wine, stirring for 2-3 minutes.  The wine will bubble and absorb into the mix.  Lower the heat to medium.  

Meanwhile, have the stock on the stove in a pan over a low temperature to stay warm.  Once the wine has absorbed into the mix, begin ladling 1/2 cup of stock into the pasta mix, stirring to combine.  After the ladle of stock has absorbed into the pasta, continue adding 1/2 cup at a time until you have added 2 cups.  At this point taste a piece of pasta to determine the tenderness.  It will mostly likely be too firm.  

Add in the chicken thighs and 1/2 teaspoon of kosher salt, stirring with the pasta.  Cook the chicken while continuing to add more stock and stirring.  Check the chicken for doneness of internal temperature of 165 degrees.  When the chicken has reached the correct temperature, taste the pasta for texture.  You will want a tender pasta but not soft.  You may not use all of the stock.  

Remove from the heat, adjust for seasoning, garnishing with fresh parsley and grated Parmesan cheese.  


Friday, September 9, 2022

ChezCindy: Cauliflower Goat Cheese Gratin


When has cauliflower looked better?  This recipe is a simple 5-ingredent, minimal time and cleanup dream.  A dream only if you like cauliflower.  In my house, that is just me and the dogs!

My recipe is adapted from Bobby Flay, downloaded from the Food Network years ago.  It is super healthy by way of the cauliflower but watch out for the calories coming from heavy cream and three types of cheese.  Serve it with a green salad or a simple piece of grilled fish or chicken.  


Cauliflower Goat Cheese Gratin
1 medium head of cauliflower, cut into florets
1 cup heavy cream
6-ounces goat cheese
2 ounces grated fontina cheese
2 ounces grated Parmesan cheese
1/2 teaspoon kosher salt

Preheat the oven to 400 degrees.

Place the cauliflower florets into a medium size casserole dish, spreading out into an even layer.  Pour in the cream.  Crumble and scatter the goat cheese over the florets, along with the fontina and Parmesan cheese.  Sprinkle on the kosher salt.   

Place the casserole dish into the hot oven, roasting for 30 minutes until the cauliflower is tender and the sauce has slightly thickened.  Remove from the oven, resting for 10 minutes before serving.


Note:  Other cheeses can be substituted such as gruyere and Pecorino, and herbed goat cheese work well together.  


Thursday, September 1, 2022

ChezCindy: Summer Corn Cauliflower & Chickpea Salad


Inspiration for this salad came from thoughts of Mexican Street Corn.  Which would have been fabulous as a salad, but I took this salad in a different direction to the Mediterranean.  I used Greek yogurt in the salad dressing, chickpeas, feta cheese with fresh mint and parsley, which all compliment the sweet summer corn and cauliflower.   

The salad is wonderful for sharing and can be made ahead of time as it holds up well fully tossed with the salad dressing.  It may even get better after sitting for 20-30 minutes as the ingredients marinate in the dressing bringing out the best of each. 


Summer Corn Cauliflower Salad with Fresh Herbs
1/2 of a large cauliflower head
1 15-ounce can chickpeas, drained
3 large ears corn, cut from the cobs
1/2 red bell pepper, cut into 1/4-inch pieces
3 tablespoons chopped fresh parsley
3 tablespoons chopped fresh mint
1 teaspoon kosher salt
1/4 teaspoon black pepper
3 tablespoons crumbled feta cheese
1 head bibb lettuce

Creamy Yogurt Salad Dressing (recipe follows)

Cut the cauliflower into large pieces, placing each into the bowl of a food processor fitted with the steel blade.  Pulse until chopped into small bits.  You should have about 4 cups for the recipe.  Transfer the chopped cauliflower into a large bowl.

Add the drained chickpeas to the bowl with the cauliflower.  Add in the fresh cut corn as cut from the cobs, chopped red bell pepper, chopped parsley and mint.  Sprinkle on the salt and pepper.  Using a large spoon, gently stir to combine.  

Pour 6-8 tablespoons of the Creamy Yogurt Dressing over the salad, tossing to combine.  To serve, place individual leaves of the bibb lettuce onto a platter, spooning the dressed salad into each lettuce leaf, piling the remaining salad into the center.  Crumble the feta cheese over the salad.  Garnish with additional herbs, and a drizzle of additional salad dressing.  


Creamy Yogurt Dressing
1 tablespoon Dijon mustard
1 tablespoon honey
1 teaspoon kosher salt
pinch of fresh ground pepper
2 tablespoons apple cider vinegar
6 tablespoons olive oil
2 tablespoons plain full fat Greek yogurt

In a small bowl, add the Dijon mustard, honey, salt and pepper; whisk to combine.  Add the vinegar; whisk to combine.  Slowly drizzle in the oil, whisking vigorously while doing so.  Whisk in the yogurt.  


Saturday, August 20, 2022

ChezCindy: Classic Iceberg Wedge Salad


Iceberg lettuce may have fallen out of favor with so many lettuces taking top marketing for nutritional value and taste.  But none of the kale, spinach or arugula mixes can stand in for the classic wedge salad.  Only iceberg can take center stage for this steakhouse favorite.  

This salad is simple and quick to put together, great to serve on a hot summer day.  The lettuce is crisp, juicy and deliciously chilled, served with just a few ingredients.  Key to success is a creamy dressing drizzled in abundance.  Optional additions are cherry tomatoes, bacon, and chopped fresh herbs.  Most are served with blue cheese, but feta could stand in as a substitute if blue cheese is not preferred or skip the cheese altogether.  

As far as nutrition goes, iceberg lettuce can hang in with the other lettuces.  It is loaded with vitamins K and A and has high water content to keep us hydrated on these hot summer days.  Dig in and enjoy!


Classic Iceberg Wedge Salad
1 head of iceberg lettuce
1 cup cherry tomatoes, each sliced in half
2 tablespoons chopped fresh chives
4 tablespoons crumbled blue cheese
flakey sea salt for serving

Creamy Salad Dressing 
1 tablespoon Dijon mustard
1 tablespoon honey
1 teaspoon kosher salt
pinch of fresh ground pepper
2 tablespoons apple cider vinegar
6 tablespoons olive oil
2 tablespoons mayonnaise
2 tablespoons plain full fat yogurt

In a small bowl, add the Dijon mustard, honey, salt and pepper; whisk to combine.  Add the vinegar; whisk to combine.  Slowly drizzle in the oil, whisking vigorously while doing so.  Whisk in the mayonnaise and yogurt. 


Putting it all together:  Make the dressing, then keep chilled until ready to serve the salad.  

Using a large knife, cut the head of iceberg lettuce into 4 equal wedges, cutting through the core.  Place each wedge onto a large dinner plate.  Drizzle 2-3 tablespoons of dressing over each wedge.  Scatter a generous portion of halved cherry tomatoes, a sprinkling of chopped chives, 1 tablespoon of blue cheese, and a shower of flaked sea salt over each wedge.  Serve chilled within 30 minutes of dressing the salad.  


Friday, August 12, 2022

ChezCindy: OMG Giant Peach Muffins


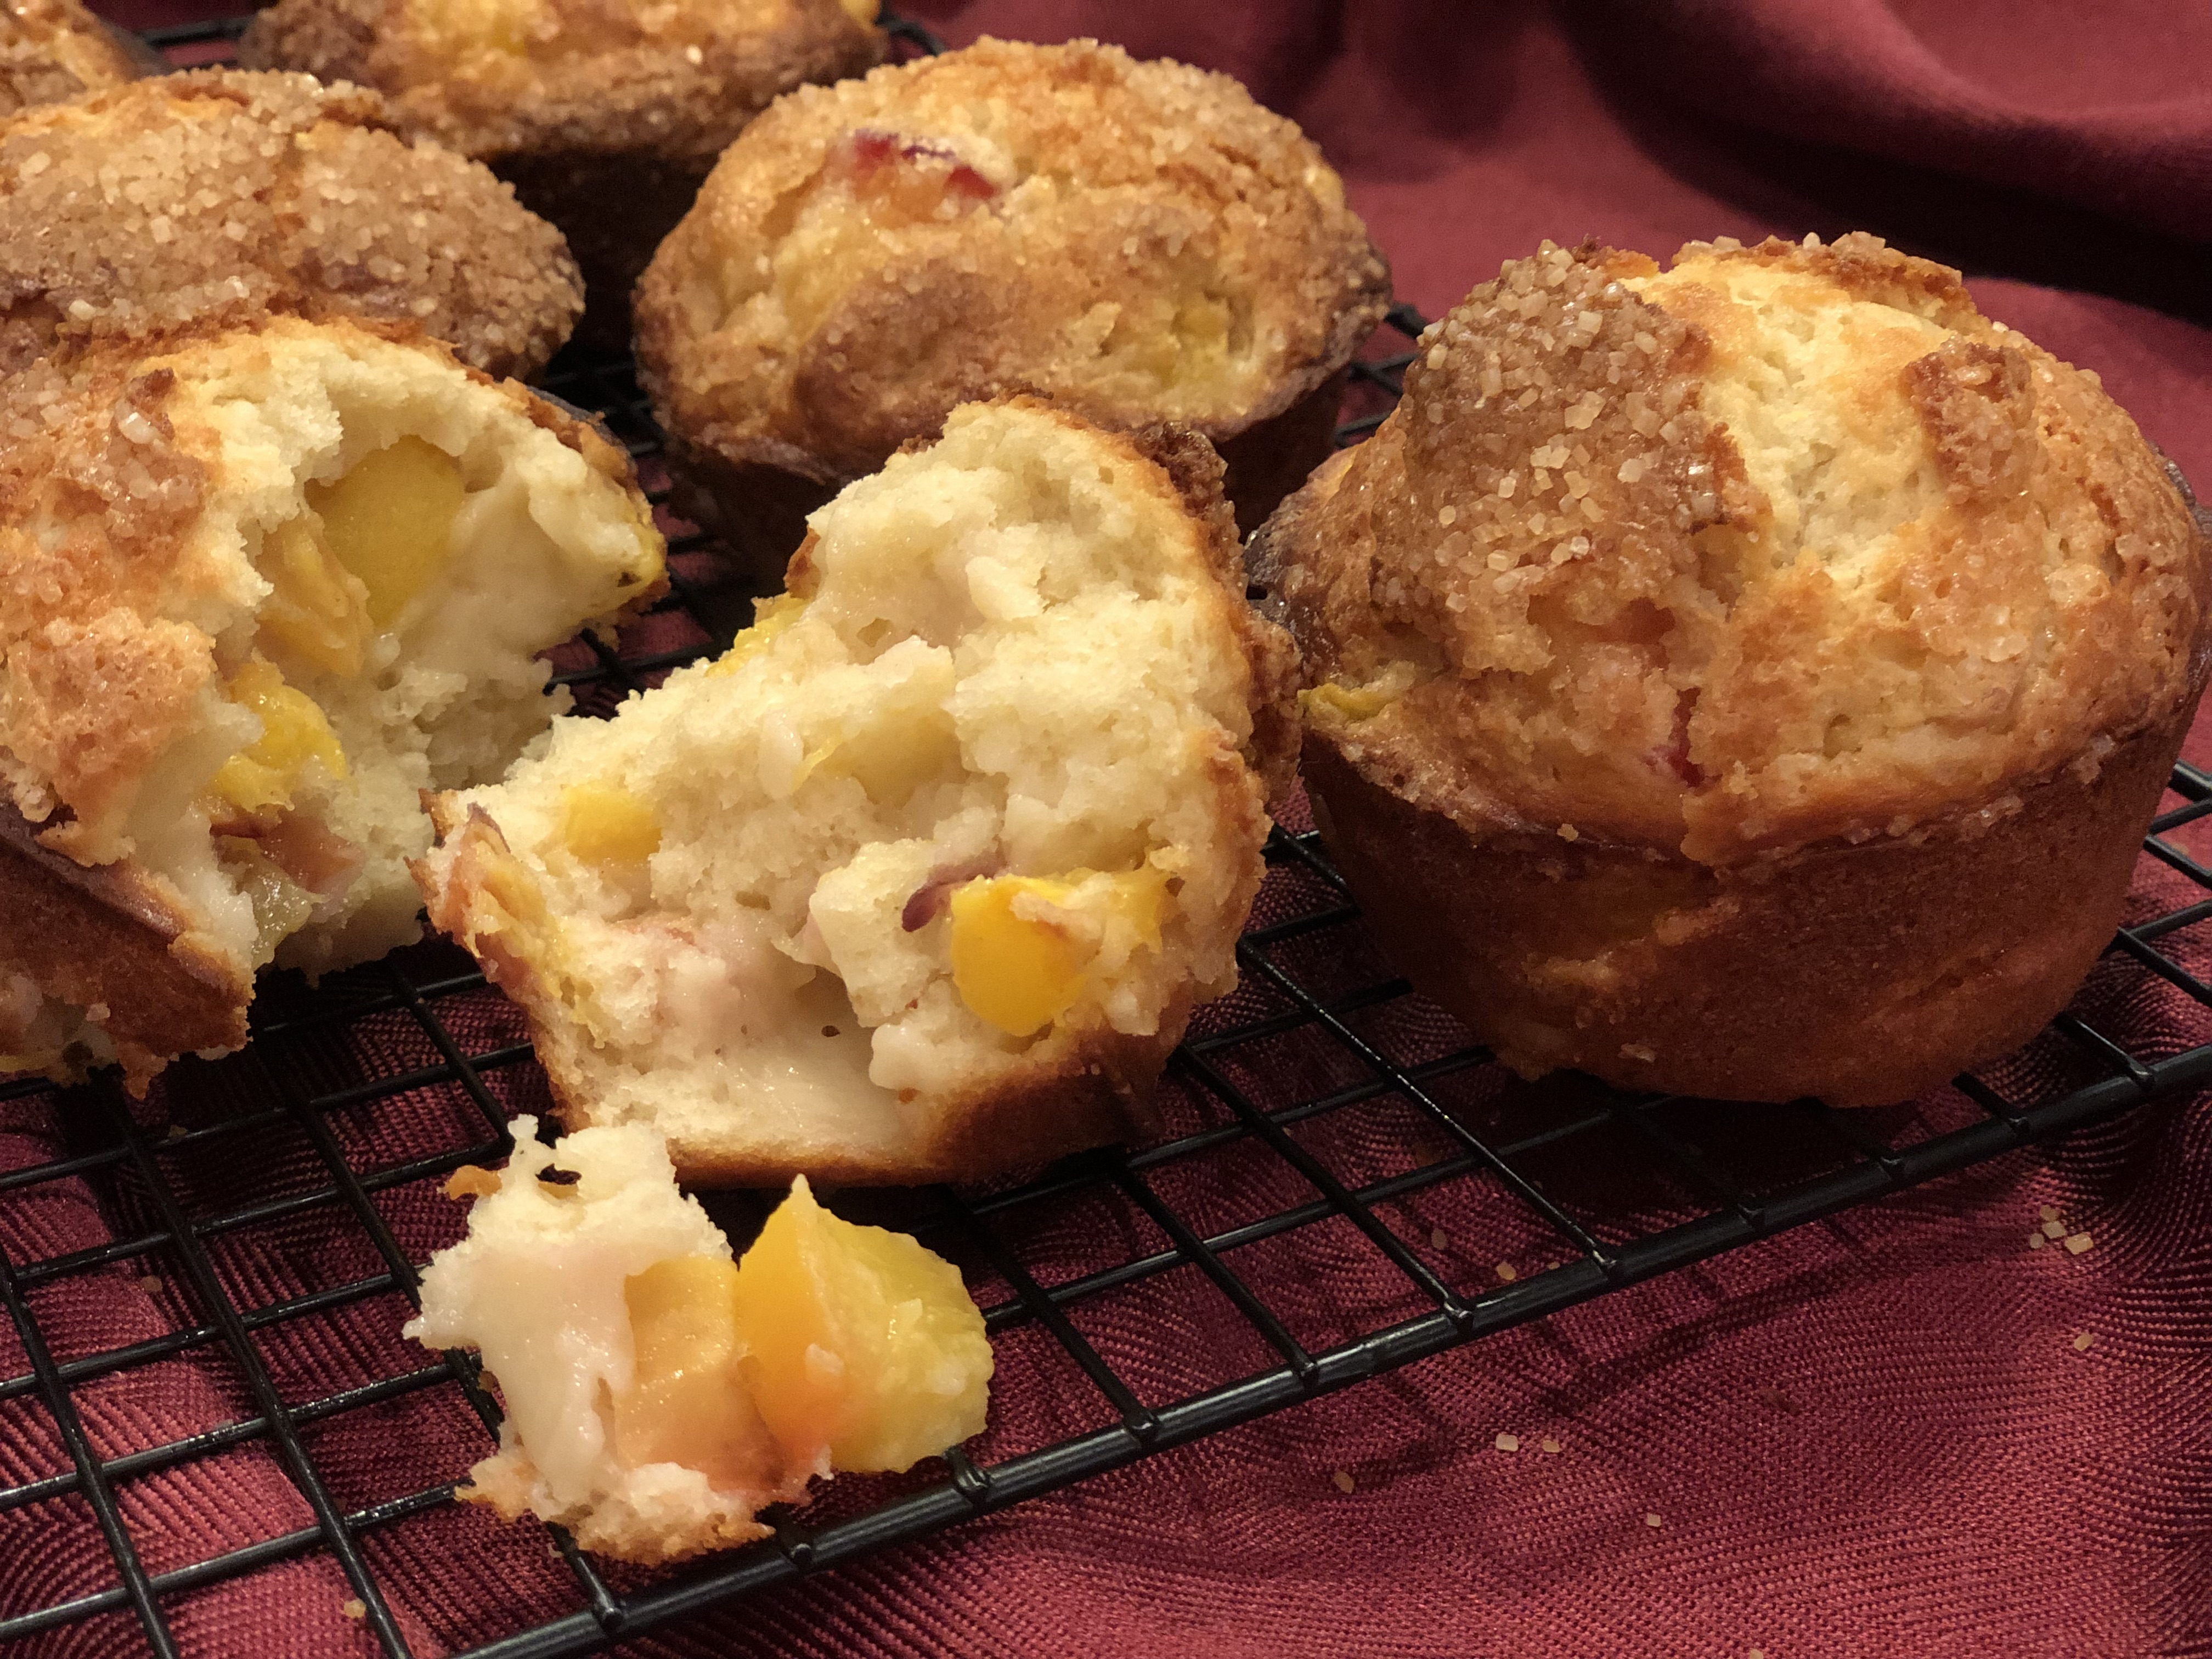
These giant peach muffins were inspired by the abundance of peaches I had from my annual peach picking with my BFFEach year we head out for our adventure to pick peaches.  The peaches are always gorgeous, and I come home with a full peck, which is a lot of peaches.  Peaches don't hold for a long time like apples.  They ripen quickly and need to be eaten, used for baking and cooking, or frozen within a short time period.  I've been baking, and sharing, many of my favorite recipes, like peach bars and this new recipe for peach muffins.

This recipe for Giant Peach Muffins was inspired by a new cookbook by Jessie Sheehan, Snackable Bakes.  Ms. Sheehan's book is full of fabulous recipes that come together quickly with limited equipment, usually just a large bowl, whisk and rubber spatula, and go from idea to eating in short time.  I like that!  Not always do I want a baking project that takes a full day or multiple days.  Simple.  

The original recipe called for cherries, another favorite fruit, but I really needed to use the peaches.  The recipes in this book offer suggestions for swap-out variations.  It seemed logical if I could swap out cherries for raspberries or strawberries, I could do the same with peaches.  Lucky for me, it worked beautifully.  

A few notes about the recipe.  By itself without fruit the recipe is delicious.  Full of vanilla, deeply golden brown and a great texture.  If you choose to use fruit, use a soft fruit like peaches, raspberries, or cherries, measuring to 2 cups of chopped fruit.  A firm fruit such as apples might not cook fully.  The recipe calls for 2 tablespoons of vanilla extract.  That is not an error as you might think teaspoons is meant.  The vanilla is delicious in the muffins and your house will smell wonderful as the muffins are baking.  If you don't have turbinado sugar in your pantry, it is a good addition to have on hand.  You will use it often to add a sprinkle of shine and crispy tops to many pies, cookies and muffins.  I highly recommend it.  The recipe calls for starting the bake at a high temperature, 400 degrees.  This will yield a high puff and a quick brown of the muffin.  The temperature is reduced 15 minutes into the baking time to 350 degrees.  Make note of this reduction otherwise the muffins will be over baked.  Below is my adaptation of Ms. Sheehan's muffin recipe.  


Giant Peach Muffins
1/3 cup vegetable oil
1 1/4 cups granulated sugar
2 tablespoons vanilla extract
2 large eggs
2/3 cups full-fat yogurt or sour cream
1 1/2 teaspoons baking powder
1/4 teaspoon baking soda
1 teaspoon kosher salt
2 cups all-purpose flour
2 cups chopped peaches, raspberries or cherries

Turbinado sugar for sprinkling 

Preheat the oven to 400 degrees.  Grease the wells of a large 6-well muffin tin (not standard size) with cooking spray oil to coat thoroughly.  Set aside.

Working with a large mixing bowl, add in the oil, sugar and vanilla whisking to combine for 30 seconds.  Whisk in the eggs, one at a time, then add in the yogurt whisking to combine.  One at a time, whisk in the baking powder, baking soda, and kosher salt whisking well after each addition.

Fold in the flour and the peaches, (or other fruit if using) using a rubber spatula just until combined, not over mixing.  Divide the batter among the prepared muffin wells.  The 6 wells will be very full.  You may have batter leftover.  Sprinkle 1 teaspoon of turbinado sugar over the top of each muffin.

Place the muffin tin into the preheated oven at 400 degrees, baking at this temperature for 15 minutes.  Reduce the oven temperature to 350 degrees, baking for an additional 20-25 minutes until deeply brown and a toothpick inserted into the center of the muffin comes out clean with just a few crumbs. A total of 35-40 minutes baking time.  

Remove from the oven, allowing the muffins to cool in the pan for about 10 minutes.  Using a butter knife gently loosen the muffins from the tin, transferring to a wire rack to cool.  Keep the muffins on the counter until they are gone, up to 2 days.  


Sunday, July 24, 2022

ChezCindy: Grilled Steak with Farm Tomatoes & Feta


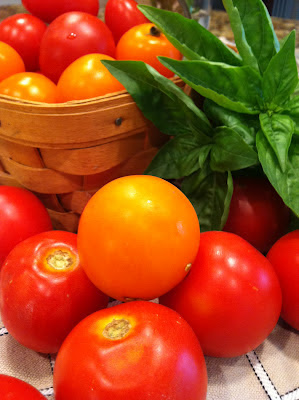
This simple dish of grilled steak and tomatoes has been in my cooking rotation for many years.  Sometimes I forget to make our favorites as it had been years since I made this for dinner.  Last night was perfect timing as I had lots of gorgeous tomatoes from the farmer's market.  

The recipe is simple.  Basically, grill a strip steak as you prefer, medium rare for us.  The key to success is to have really good tomatoes from a farm stand, perfectly ripe and ready for use.  Make a vinaigrette and you are done.  I like to serve a few center-cut slices of the steak, pile on a good amount of tomatoes, drizzle all with vinaigrette and a sprinkle of crumbled feta.  A fabulous summer meal.  


Grilled Steak with Farm Tomatoes and Feta
2 strip steaks, 10-12 ounces for each steak
4-5 large heirloom tomatoes, any variety and color
Shallot vinaigrette
Feta cheese
Fresh basil for garnish

Serves 4

Light a grill or prepare an indoor grill pan as preferred.  Season the steaks with salt and pepper.  Grill to your preference in temperature.  Remove from the grill transferring to a plate to rest for 5 minutes.  

While the steaks are grilling, make the shallot vinaigrette and prepare the tomatoes.  

1 tablespoon finely chopped shallots
1 tablespoon Dijon mustard
1 tablespoon honey
1/2 teaspoon kosher salt
1/8 teaspoon cracked black pepper
2 tablespoons red wine vinegar
6 tablespoons olive oil

To make the vinaigrette:  Place the chopped shallots, Dijon mustard, honey, salt & pepper in a small bowl.  Whisk to combine.  Add the vinegar; whisk to combine.  Allow this mixture to marinate for 5 minutes.  This will mellow the flavor of the shallots.  Slowly drizzle in the oil, whisking vigorously while doing so.

Cut the tomatoes into 1-inch pieces.  Place the tomatoes into a separate medium size bowl.  Add 3-4 tablespoons of vinaigrette to the tomatoes, tossing gently to combine.  

Putting it all together:  After the steak has rested, cutting crosswise, cut each steak into 1/2-inch slices.  Place 3-4 slices in the center of each plate.  Place a heaping mound of the dressed tomatoes above the sliced steak.  Drizzle a tablespoon of dressing over the steak slices, crumble the feta over the steak and tomatoes. Garnish with fresh basil leaves.  


Sunday, July 17, 2022

ChezCindy: Blondies - An American Cookie


Blondies are a bar cookie quite often compared to brownies but without chocolate.  I had never baked or even considered baking a blondie until recent years.  I was fortunate enough to be in vicinity of being able to purchase cookie boxes from Joy Cho Pastries.  Joy presented a sampling of various cookies in her boxes, all with her unique application of ingredients to traditional cookies.  Occasionally the boxes included blondies.  The blondies became my coveted favorite that I would declare as mine, not sharing with anyone else.  Sounds kind of harsh, but my husband prefers chocolate cookies, so it worked out well.  Joy is back in NYC doing fabulous baking and I am left on my own to bake blondies.  

First, I had to do some research to find a base recipe.  It turns out blondie recipes can be somewhat controversial among bakers.  I have learned that the first blondie recipe came into publication in the1890's using molasses as the sweetener, lending a dark color to the cookie bar.  Blondies were quickly upstaged by Brownies using a similar recipe with the addition of chocolate and using white sugar in place of molasses.  Blondies fell out of favor until the late 1980s when New York City bakeries and delis started selling the homemade cookie bars as packaged sweet treats.  Recipe development took off from there, with a more modern spin on the traditional recipe by adding leavening (baking powder and baking soda), increasing the amount of butter used, switching from molasses to brown sugar, and adding decadent ingredients like chocolate chips, white chocolate chips, toasted nuts and more.  

The first recipe I tried was from one of my mother's old cookbooks.  It was truly awful, very bland and flat.  I am using them as dog treats.  Much research later, I have found my base recipe for Blondies.  This recipe is a blend of modern and traditional, with the use of leavening, and the only add-in is toasted walnuts.  My vision is to use this base recipe with various changes such as adding spices like cinnamon or cardamom.  I most certainly will add chocolate chips at some point, and maybe adding dried cherries or cranberries.  


Chewy Blondies with Toasted Walnuts
2 cups all-purpose flour
3/4 teaspoons baking powder
1/2 teaspoon baking soda
1/2 teaspoon kosher salt
2 sticks (8-ounces) unsalted butter, room temperature
1 1/2 cups light brown sugar, packed
1/2 cup sugar
2 large eggs, room temperature
2 teaspoons vanilla extract
2 cups toasted walnuts, chopped

Preheat the oven to 325 degrees with the rack placed in the center of the oven.  Butter and lightly flour a 9"x13" baking pan.  Set aside.

In a medium size bowl, add in the flour, baking powder, baking soda and salt, stirring to combine.  Set aside.

Working with a stand mixer fitted with the paddle attachment, add the butter to the bowl, mixing for 3-4 minutes until creamy.  Add in both sugars, creaming together for 2-3 minutes.  Add in the eggs, one at a time, mixing for 1 minute before adding the second egg and the vanilla, mixing again for 1 minute.  Turn off the mixer to add in the dry ingredients, with the mixer set to low speed, mix until just combined.  Add in the toasted walnuts, using a rubber spatula to be sure they are evenly distributed within the batter. 

Transfer the batter to the prepared baking pan.  The batter is somewhat thick and will take some effort to distribute evenly.  Bake in the preheated oven for 35-38 minutes.  The blondies will slightly pull away from the sides of the pan and the top will be lightly browned.  Cool the blondies in the pan for 10 minutes.  Place a cooling rack on top of the pan to flip out the blondies from the pan.  Place a large cutting board on top of the blondies to flip over again so that the blondies are now right side up.  

The blondies can be cut while still slightly warm or can be cut when they are cooled to room temperature.  Store the cut blondies in an air-tight container or freeze for later use.