Pages

Saturday, March 26, 2022

ChezCindy: Meatballs and Mexican Salsa Sauce


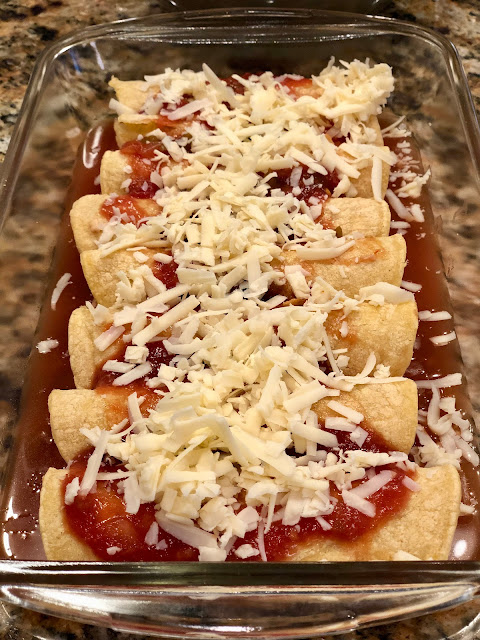
Here is a new twist on meatballs simply by adding in jarred salsa to make Mexican mini meatballs. The meatballs are a fun and delicious appetizer for a party, or as a meal served with a side of roasted vegetables.  I made a delicious soup by adding the cooked meatballs to my recipe for chicken soup substituting the poached chicken with the meatballs, to make a Mexican meatball soup.   

This recipe is a great one for young chefs just starting out in the kitchen.  There is not much to chop, and with supervision at the stove, all new cooks will gain a sense of accomplishment.  Short on prep time and long on flavor!  


Meatballs and Mexican Salsa Sauce
1/3 cup plain breadcrumbs
2 large eggs
2 tablespoons milk
2 tablespoons ketchup
2 tablespoons chopped fresh cilantro
1 teaspoon dried oregano
1 teaspoon kosher salt
1/2 cup grated Parmesan cheese
1-pound lean ground beef
2 tablespoons oil

1 cup mild or spicy jarred salsa
1/2 cup water

Working with a large bowl, add the breadcrumbs, eggs, milk, ketchup, chopped cilantro, dried oregano and salt, stirring to combine.  Add in the grated Parmesan cheese and the ground beef.  Using a fork, or your hands, mix the cheese and ground beef in with the breadcrumb mixture.  Mix until just combined so as not to overwork the mixture.  

Place a deep-sided pan over medium-high heat.  Add 2 tablespoons of oil to the hot pan.  Using a small spring-loaded scoop or a teaspoon measure, scoop the meatball mixture into mini meatballs packing it firmly, adding them directly to the hot pan.  Cook the meatballs without moving them until nicely browned on the first side, about 5 minutes.  Use a flat metal spatula or metal spoon to flip over to continue cooking the meatballs for additional 2 minutes.  You may need to do this in 2 batches to cook all of the mini meatballs, setting the partially cooked meatballs aside on a plate, repeating with the remaining meatball mix.  Return all of the meatballs to the pan if having cooked in 2 batches.  The meatballs are not fully cooked at this time.  

Add the cup of mild or spicy jarred salsa to the hot pan with the partially cooked meatballs, along with 1/2 cup water without stirring to allow the sauce to bubble and finish cooking the meatballs, about 5 minutes. Gently stir the salsa sauce, scraping the bottom of the pan to loosen the browned bits from the bottom of the pan to incorporate into the salsa sauce.  Turn off the heat, remove the meatballs and salsa sauce to a serving bowl.  Enjoy!


Saturday, March 19, 2022

ChezCindy: Quick and Easy Chicken Enchiladas


Rotisserie chickens are fabulous anytime just as they are, served with a salad and a fresh baguette, all bought from the grocery store for a quick delicious dinner.  What is really great about rotisserie chicken is the versatility of the leftover chicken!  I've mentioned this in previous posts, like this chicken pot pie recipe.  In this simple recipe I'm using the leftover chicken to make quick and easy chicken enchiladas.  All it takes to make an entirely different dinner are a few additional ingredients, store-bought as well.  Great for dinner when you are short on time but want a flavorful meal.  

Quick Chicken Enchiladas
1 cup refried beans, from 1 15-ounce can
1 teaspoon dried oregano
3 cups shredded rotisserie chicken
3 cups shredded cheddar cheese, divided
1/2 teaspoon kosher salt
1 16-ounce jar of mild salsa, divided (spicy if preferred)
12-15 6-inch soft corn tortillas

Additional toppings and sour cream for serving, if desired


Preheat the oven to 375 degrees.

Working with a large bowl, stir together the beans, oregano, and 1 cup of shredded cheddar cheese.  Add in the shredded chicken.  Season with salt, stirring to combine.

In a separate smaller bowl, add the jar of salsa with 1 cup of water, stirring to combine.  Measure out 1 cup of the thin salsa mixture, pouring it into a 9x13-inch glass Pyrex baking dish.  

Lay out the soft corn tortillas.  Evenly divide the chicken and cheese mixture among the tortillas, slightly less than 1/4 cup for each tortilla, placing the chicken mixture in a line across the tortilla.  Pick up one side of the tortilla, lifting it to cover the chicken.  Continue to roll the tortilla and chicken mixture to form a long slender tube.  Place the tortilla chicken tube in the baking dish with the salsa, seam-side down.  Continue rolling each tortilla chicken mixture placing each into the baking dish.  Gently press each tortilla with your hands, fitting each tortilla roll closely together to fill the baking dish.  Pour the remaining salsa over the rolled tortilla.  Then sprinkle the remaining cheddar cheese over the enchiladas.  


Place the baking dish into the hot oven, baking the enchiladas until the cheese is melted and the enchiladas are hot, about 25-30 minutes.  Serve with additional toppings and a spoonful of sour cream.  


Sunday, March 13, 2022

ChezCindy: Shrimp & Cod Parchment Packets


The technique of cooking seafood, vegetables, and herbs together in a parchment paper packet is a French cooking process called 'en papillote'.  The process of sealing the ingredients within the paper packet creates steam from the natural juices released from the seafood and vegetables.  The ingredients mingle and mix, cooking quickly yielding a complete meal for your family and guests to enjoy.  The only accompaniment needed is some great bread to sop up all of the juices, while you soak up the praise. 


Shrimp & Cod en Papillote
4 4-ounce portions of skinless white flakey fish, cod or halibut
8 large shrimp (13-15 per pound) peeled and deveined
3 teaspoons kosher salt, divided
4 tablespoons olive oil, divided
1-2 small zucchini
1-2 small yellow squash
2 medium carrots, scrubbed and peeled
2 small shallots
1 cup cherry tomatoes
2 tablespoons unsalted butter
fresh herbs, such as Italian parsley or basil 

Preheat the oven to 400 degrees.  Place 4 sheets of parchment paper (approximately 16"x12" in size) on a work surface.  Fold each sheet in half crosswise, like a book.  Set aside.

Using a vegetable peeler, slice the zucchini, squash, and carrot into ribbons by pulling the vegetable peeler across the length of each vegetable.  Peel the shallots and slice thinly. Cut the cherry tomatoes in half. 


Working with the prepared parchment paper, open the folded sheets spacing each sheet in front of you to begin.  Divide the ribbons of zucchini, squash, carrot, (about ¼ cup total combined) and sliced shallot among the 4 sheets of parchment, placing the vegetables in the center just under the fold on one side of the paper.  Spread out the vegetable bundle into a thin layer, roughly 4x3-inches in size.  Sprinkle with 1/4 teaspoon of salt and a pinch of pepper, and drizzle with 1/2 tablespoon of oil.  Place one portion of fish on top of the vegetables.  Place 1 shrimp nestled at the right side of the fish and 1 shrimp nestled at the left side of the fish, using a total of 2 shrimp per packet.  Scatter the tomato halves around the fish and shrimp.  Drizzle the fish, shrimp and tomatoes with the remaining oil, sprinkling each fish packet with 1/2 teaspoon of salt and a pinch of pepper.  Place a 1/2 tablespoon of butter onto the top of each fish.  Add a 1/2 tablespoon of fresh herbs to each packet.  


Close the top half of the parchment paper over the fish and vegetables.  Begin crimping the parchment paper, starting at one corner of the folded edge, make small overlapping folds to close the open edges of the packet.  The paper will begin to resemble a half-moon shape.  Crimp the last edge for the final seal.

Place the sealed packets onto 2 large, rimmed baking sheets - 2 packets of fish per baking sheet.  Place in the preheated oven and bake for 12 minutes.  Remove from the oven and allow to rest for about 5 minutes.  This is where you'll want to toast some bread, ready for sopping up the juices.  Place one packet onto 4 separate plates.  Carefully, using scissors to cut open the top of each packet (steam will escape), keeping the fish and vegetables resting inside of the packet with its juices.  Serve as a full meal and enjoy.


Friday, March 4, 2022

ChezCindy: Taco Tuesday with Chickpea Tacos


Have you ever wondered if there is a difference between chickpeas and garbanzo beans?  They are actually the very same thing.  It is just a matter of word preference or even a regional dialect.  

No matter what term you use, chickpeas are a versatile legume most well-known for its use in hummus. I have been using chickpeas in so many other ways, like this chicken and chickpea stew.  Or simply tossed into my lunch salad for a quick hit of protein.  Dried chickpeas are inexpensive and easy to make but take a commitment of time from start to finish.  I love the convenience of using canned chickpeas.  Ready anytime when I am.  

I recently developed a recipe for tacos using chickpeas in place of meat.  It is quick to come together, with most ingredients coming straight from the pantry.  Use this meatless mixture as you would taco meat in taco shells or tortillas, adding your favorite toppings.  A store-bought taco seasoning mix can be used, or I have a recipe you can use to make your own.  This earlier post also has a great recipe for taco ranch dressing that is delicious on the chickpea tacos. 

 The recipe below can easily be doubled to feed a larger crowd on your next Taco Tuesday.  


Chickpea Vegetarian Tacos
1 15-ounce can unsalted chickpeas
1 tablespoon neutral oil, such as canola or avocado oil
1/4 cup finely diced onion
1 clove garlic, minced
1/4 cup chopped roasted red pepper, store-bought
3 teaspoons taco seasoning*
1 tablespoon chopped cilantro or parsley

Reserving the liquid, strain the liquid from the can of chickpeas.  Set both aside.  
 
Working with a 10-inch skillet over medium heat, add in the tablespoon of oil, finely diced onions and minced garlic, stirring to combine cooking for about 5 minutes until the onions have softened.  Stir in the chopped roasted red peppers and the drained chickpeas.  Using a potato masher or a large fork, mash the chickpeas until they are coarsely broken into small pieces.  Heat the mixture for about 3-5 minutes.  Sprinkle in the taco seasoning and 1/3 cup of the strained chickpea liquid, stir to combine loosening the mixture with the added liquid.  Add in the chopped cilantro or parsley, and additional liquid if a looser taco texture is desired.   

Serve with tacos shells or tortillas with your favorite toppings.  

*  Store-bought taco seasoning is fine or use my recipe.